
Our support team often gets asked a variation of this question: How do I process an order on behalf of a customer?
- I took an order for a customer over the phone, can I run a transaction for it in WooCommerce?
- I just accepted an order for a product with a custom price, and I’d like to charge the customer manually. Can I do it?
- I’m going to be charging for expedited shipping, so I need to process an add-on order for a customer. How do I process payment for a new fee?
All of these scenarios are solvable, assuming you have a saved payment method for the customer!
First, if you don’t have a saved payment method (which you might not for a phone order, for example), I recommend going through the checkout process in a new browser (or incognito window), just like the customer would — this is the best way to get the order into WooCommerce and processed in a secure way on behalf of your customer.
So, now let’s move on and assume that you do have a saved payment method for the customer. Chances are you’re using one of our payment gateways that lets customers use a saved card, so I’ll use Authorize.Net CIM in this example.
The best way to process a “manual payment” with WooCommerce is to create a pending order, then use the free User Switching plugin to switch to the customer account, and pay for the order as the customer.
The benefit to this approach is that, when pretending to be the customer, the order will already have all customer data populated. This is vital in cases where tax should be assessed, since WooCommerce will apply taxes for the order, and you can be sure that everything was assessed and tracked properly.
This method also keeps a record in WooCommerce so the customer can access their order and payment record as needed.
Process manual WooCommerce payments
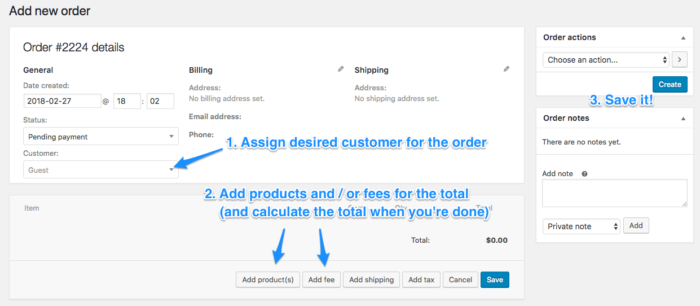
To begin, we’ll need to create a pending order assigned to our customer. When you create this order, be sure to:
- Add the customer
- Add the product(s) to be purchased, or create a fee if you don’t have a product to use for the order. Fees are very handy for custom orders; you can also add shipping lines for additional shipping fees.
- Leave the status as “Pending payment”
- Save / create the order
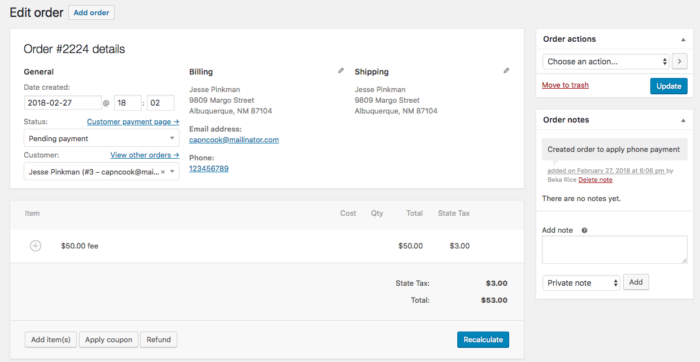
You may also find it helpful to add a note why you created this order for record keeping, but you’re now ready to switch to the customer’s account to pay for the order! Double-check that everything looks right:
Pro-tip: You can even rename your fee so it’s more descriptive for your accounting and your customer’s records.
To switch to the customer you assigned in the previous step, remember you’ll need the User Switching plugin is installed and active on your site.
Payment for WooCommerce orders as a customer
To switch to the customer you just selected for the order, go to your “Users” list in WordPress, and find the customer. You’ll see a “Switch to” action that you can use to select the customer’s account. (You’ll be able to switch back later.)
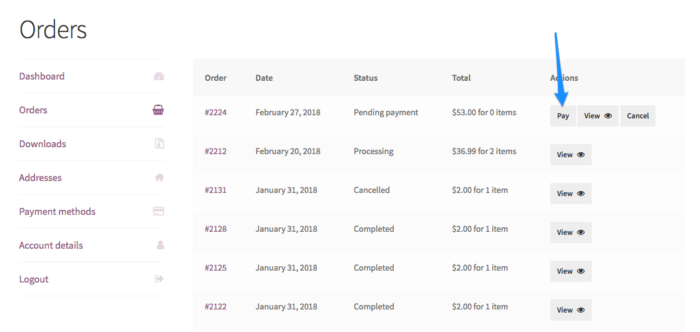
Once you click this, you’ll be using the customer account instead of your own, and can go to My Account > Orders, where you’ll be able to click the “Pay” link for the order.
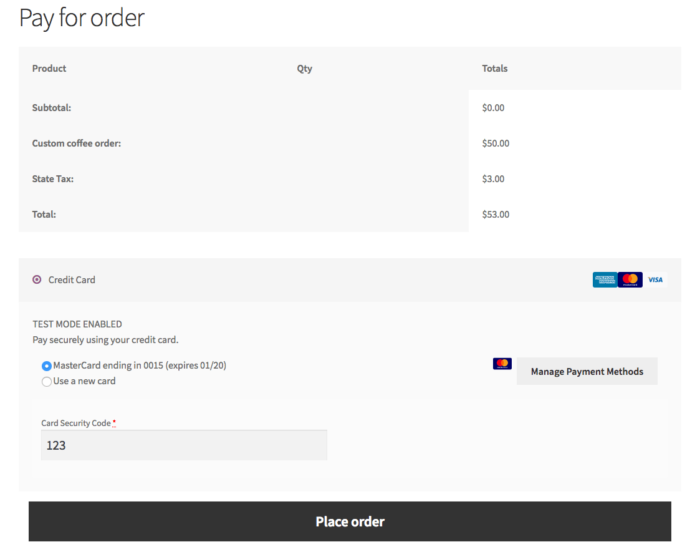
Since you’re using the customer’s account, when you visit the pay page, you’ll see any saved payment methods they have available. Choose a saved method to complete payment for the order. The order will be updated in WooCommerce, while also keeping your records clean.
When you’re done, you can switch back to your account by clicking the “Switch back” link from User Switching — this will be available in the core “Meta” widget, if you’ve added it to your site, or at the very bottom of each page if not.
All done! Now the order has been paid for without any action required by your customer, and this method ensures you have accurate order and tax records for your shop.

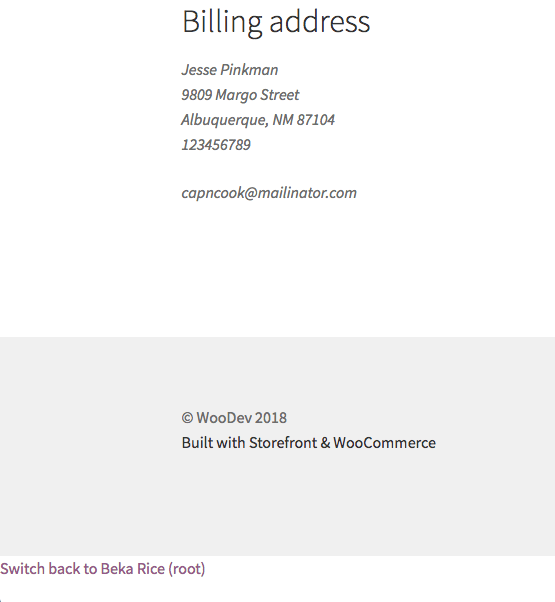
very helpful, thanks…however…I can’t figure out how to switch back to my user account. I processed payment, all good. But then how/where do I switch back to MY account in my website without having to logoff from their account and log back in to mine?
try scrolling all the way to the bottom of the page, the “switch back” link is at the bottom. If you don’t see it there, you can also add this plugin to your site to make it available as a store notice (click “Download zip” and install).
hi beka,
your post was helpful, but i need to enter a deposit amount. currently we’re set to offer payment if full or 50% deposit. how can i enter a payment for a different amount and then show the remaining balance?
Hi Beka, thanks for the reply…but scroll to the bottom of what page? when I finish with the checkout procedure, I’m in the customers account checkout page, at the bottom is only the footer of our website…nothing else. I’ll try the plugin. Seems odd to have a plugin to make another plugin actually work correctly.
It should work on every page, at the very bottom of your site. If you’re not seeing it, there may be something on your site covering it up unfortunately. In which case ,the extra plugin I linked to should work!
Wonderful post.
I’m trying to add manual order for a recurring order, after clicking on Pay for your order, the order details are shown properly but no sign/label for the recurring/subscription payment.
Is is possible to add manual orders for subscription based products?
You’d need to purchase the subscription item via checkout while signed in as the customer instead when WooCommerce Subscriptions is active — that way, the payment details will be saved on the subscription record.
What payment gateways does this work with?
Hey Chris! This will work for any payment gateway since you’re impersonating the customer — anything available at checkout normally is available to you here.
Hey Beka, is there a way to add the manual order without using the “User Switching” plugin and adding in the “Profile ID” of the customer’s credit card or the “Customer ID” from Authorize Net and then creating the Order in Woo backend?
The issue is that, at some point, you need to use User Switching if you want to take the payment via WooCommerce. You can’t process a transaction from the WooCommerce admin, so if you wanted to run the transaction through the ANet portal, that’s fine, but there’s no way to trigger the transaction in Woo with those pieces of info.
Thank you Beka for all the info!