While we’ve written a lot of tutorials on WordPress and WooCommerce development or how to extend WooCommerce, we’ve never written a series on how to start developing WooCommerce plugins. We’ve decided to write about building simple WooCommerce extensions so that you can get started building your own simple plugins to bend WooCommerce to your will.
All extensions are WordPress plugins that hook into the functionality of another WordPress plugin (in this case, WooCommerce). To build WooCommerce extensions, we’re typically hooking into both WordPress core and WooCommerce to build the functionality we need.
In order to get started with your first extension, you’ll need to understand which parts of a plugin are available for you to use or hook into so that you can modify or add functionality as needed. In my experience, this is the best way to start learning: you build something simple, and as you want to build something more complex, you learn more as you go.
When building your first WooCommerce extension or companion plugin, you’ll need to determine which tools are available for you to use. As we’re modifying WooCommerce, we’ll need to be familiar with hooks or methods that we can use within our own plugin.
Some of the things we can do with WooCommerce (or other plugins) externally in our extensions include:
- using hooks (actions and filters) to modify or add code
- using global variables or functions to access information stored in another plugin
- using class methods to access data, such as a cart total
- extending classes to override parts of the class or add new methods
We’ll start today with using filters to modify what WooCommerce or another plugin does.
What’s a filter?
A filter is a function that passes in data that can be altered as needed. A filter will have a tag, or a name, and a value, which is what can be altered or modified with your own custom function. Filters can also pass in additional variables to allow you to access information you need to modify the value. The Plugin API documentation has a helpful overview of actions and filters (collectively called “hooks”).
Here’s an example of a simple filter being added:
$content = apply_filters( 'the_content', get_the_content() );
This lets us filter and modify the content of a WordPress post. Filters are added by wrapping a value in an apply_filters call as seen above.
The tag and the value are present — the tag is ‘the_content’ and the second part, get_the_content(), is what we can change. For example, we could filter all of the content in a post, and replace every instance of the word “WordPress” with “Joomla” if we wanted to watch the world burn 🙂 .

Filters can also pass in one or more variables, such as this one does:
apply_filters( 'the_title', $post->post_title, $post->ID )
This filter can modify the post title (which is the value). The post’s ID is also passed in as a variable in case we only want to change the title of one post and not all posts. We can use the ID to help us scope our function to a particular post. A filter can pass in multiple variables, but only one value.
To use a filter, we’ll need to call the add_filter function. This has a simple structure:
add_filter( 'filter_tag', 'my_function', priority, arguments);
We don’t always need to add the priority and arguments, but we’ll always use a custom function to adjust the value the filter gives us.
Let’s return to the_content — we could write a custom function (called change_wp_to_joomla below) to change the content of each post for our “Joomla” troll, and then add it to all posts by using:
add_filter( 'the_content', 'change_wp_to_joomla' );
If we use a filter like the_title instead, we’ll have a variable to use, so we’ll need the priority and arguments present in our add_filter call. Let’s say I want to modify the title of one post, which we’d determine using its ID. My add_filter call will now have to add the number of “arguments”. In this case, it’s two: my title and the post ID. It would look something like this:
add_filter( 'the_title', 'my_title_change_function', 10, 2);
The default priority is 10, which affects when this addition is run. Priority 1 is run first, while higher priorities are run later in the page load.
Real Example #1: Changing the Value
Let’s start with a filter that just has a value that we can change without additional variables. The WooCommerce loop_shop_columns filter is a good place to start, as this controls how many columns of products are displayed in the shop page (how many products per row).
The filter looks like this:
$woocommerce_loop['columns'] = apply_filters( 'loop_shop_columns', 4 );
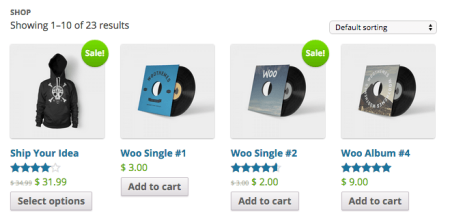
This means that, by default, four columns of products are displayed:
Our tag, which we’ll use to add our function to this filter, is loop_shop_columns, and the value is 4. We can change that value within our own function.
Create a function with a unique name — we typically prefix ours with ‘skyverge’ or ‘sv’. Then, we’ll need to “pass in” the value to our function so it can be changed. This is whatever the filter gives us to modify. We can give the variable for it any name we’d like — let’s call it $columns.
Finally, change that value in your function, and return whatever was passed into the filter. That last part is important — we need to always be sure we pass a value back out, whether changed or unchanged, so that something’s there to use.
function sv_change_shop_columns( $columns ) {
    $columns = 3;
    return $columns;
}
add_filter( 'loop_shop_columns', 'sv_change_shop_columns' );
The last part of our code snippet adds our function to the filter we’re using: we use the add_filter call with the tag for the filter, and the function name we’re using to modify it.
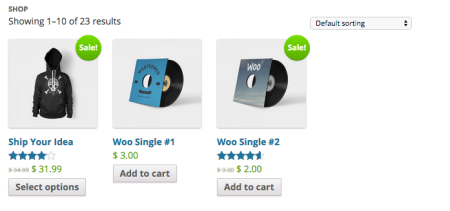
Now, we’ve got an adjusted shop layout with three columns instead of four:
If I want to, I can even patch this with a bit of CSS in my child theme’s stylesheet to adjust the column width.
.woocommerce ul.products li.product,
.woocommerce-page ul.products li.product {
    width:30%;
}
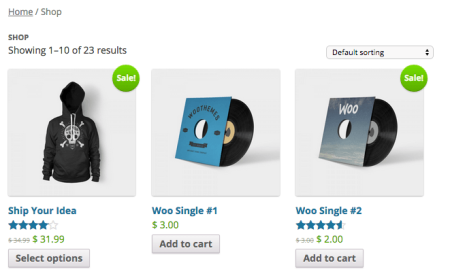
And I get a nice, adjusted shop page layout.
Real Example #2: Using a Variable
Now what happens if our filter also has a variable (or two, or three, etc) in addition to the value we can change? These variables will give us information we can use to change the variable — they might include the product (so we can access product info), the cart, or anything we need to adjust our value.
Let’s use a non-WooCommerce example this time. I ran into this while customizing Barry Kooij’s Related Posts for WP, which I recently began using at Sell with WP (I highly recommend it by the way — it’s a great plugin and we’ll mention it again when we get to classes).
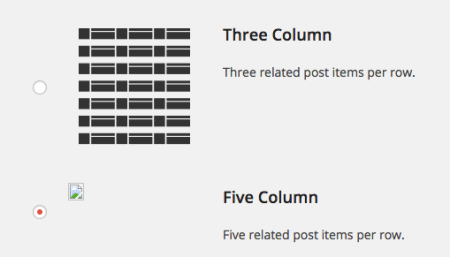
You can select a “theme” to use to display your related posts, which adjusts the layout. The theme can be selected on the settings page. Because I was adding my own theme in a companion plugin, the plugin couldn’t find an image for it because none existed in its main file.
I asked Barry to add a filter for me so that I could change the icon displayed for a theme in the settings page. This let me set an image for my new custom theme.
The value I was trying to change was the image’s URL, so that’s passed into the filter. However, in order to change the image for the correct theme, I needed to know which theme I was looking at. As a result, I needed a variable: the theme id.
The filter looks something like this (though don’t quote me, the version with it hasn’t been released yet). I’ve simplified it a bit for use here:
<img src="' . apply_filters( 'rp4wp_theme_icon', plugins_url( 'assets/images/themes/' . $theme->get_id() . '.png' ), $theme->get_id() ) . '" />
So what’s this doing? The plugin looks for an image with a url like ‘3.png’ in one of the plugin’s folders, and assigns this icon to theme number 3. If we simplify this a bit further so we can see what’s going on, the structure of that filter looks like this:
<img src="' . apply_filters( 'rp4wp_theme_icon', $image_url, $theme_id ) . '" />
Our value that can be changed is the image URL, and we can use the theme’s id (a variable) to do so if we need it.
I’ve added my theme as theme number 25, and added my own image in my companion plugin’s folder. To change this, I’ll pass in both the image URL and the theme ID to my function. I can modify the image URL, but I can’t modify the theme ID since it’s not my value — I can use it if needed, so I’ll check to see if the ID matches my custom theme, then manually set the image URL:
function sv_rp4wp_theme_icon( $image_url, $theme_id ) {

    if ( 25 == $theme_id ) {
        $image_url = plugin_dir_url( __FILE__ ) . 'assets/images/' . $theme_id . '.png';
    }

    return $image_url;
}
add_filter( 'rp4wp_theme_icon', 'sv_rp4wp_theme_icon', 10, 2 );
Notice that I then return the image URL at the end so that something is output, even if it’s not been modified. The last part of my snippet is also slightly different. We’ve added a priority and the number of variables, as I need to tell the filter how many things I’ve passed into my function so they match up.
More Filter Examples
Here are some posts that use some easy-to-follow examples of changing values via a filter:
- Change the WooCommerce Return to Shop Button URL
- Remove the “Default sorting” Product Sorting Option
Further Reading
- Never built any plugin? Start with the WordPress.org Writing a plugin guide.
- We’ve also got guides that show you how to create a main plugin file and how to create a plugin skeleton
- Bryce Adams has a great overview of how to use WordPress Hooks
- Here’s an overview of what filters and actions are from Tuts+
- Want to look at a super-simple plugin that uses filters? We have one that allows you to remove WooCommerce sorting options — the code simply adds settings and removes what’s selected and is a tiny plugin to provide you a simple example.


Thanks! Very clear intro, Beka.
Really looking forward to parts 3&4, in particular.
Thanks, glad to hear it!
Thanks for this Beka. Great intro, I ill definitely be attempting my first woo extension. There are a lot of little additions I’ve always wanted to add to my store that are just too site specific to be covered by existing extensions.
Hi Beka, great article! Is there a company out there that will build a WooCommerce extension for my company?