Our series has been going over creating your own plugin, but we’ve focused primarily on what your plugin does. You may need to let your users make choices as to how the plugin acts, so your plugin may require its own set of settings.
Using the WooCommerce settings API is the best way to add settings for a WooCommerce extension, as you’ll have to use a pretty minimal amount of code to add a setting. WooCommerce will then save your setting for you as a wp_option so you can retrieve the value using:
get_option( 'setting_id' );
Justin wrote a great primer on WooCommerce settings some time ago that’s still worth a read, as it explains how different WooCommerce settings types act and the components of a settings field. The actions referenced are now outdated, but the rest is still good.
As a supplement to that previous article, we’ll provide some specific examples of adding settings throughout this and a few additional posts.
WooCommerce Settings Areas
There are a few ways you can add your plugin’s settings to WooCommerce:
- to part of an existing tab / section
- to the “Integrations” tab (hidden by default)
- within a new tab or a unique section within a tab
We’ll cover the first method today, and the others in separate posts.
Before we talk about adding settings, you should familiarize yourself with the filters available throughout the core WooCommerce settings, as these are what you’ll use in each settings section to add your own.
Where should I add my settings?
Notice there’s one popular method I left out: as a new menu under “WooCommerce”. This should be reserved for admin areas that the user will access often, such as a list of subscriptions or memberships, or email campaigns. It’s not really a good place for settings since typically users configure settings once, then leave them be. Don’t add things this way unless you’re confident users will visit this page multiple times per week.
So now onto where we should add our settings. Many times, settings should be added to an existing WooCommerce section. For example, if your setting relates to product display, then adding it under the “Products” settings tab is a good choice. This is what we default to asking first.
Let’s say the setting is related to products, but isn’t a good fit with any of the current product settings. You can also add a new “section” to the Products tab for your settings so they’re still easy to find.
If your plugin has several settings, first ask yourself if users need all of them. Decisions, not options. If you do need these settings, and they don’t naturally fit with another section, then adding a new settings area can be warranted. If your plugin integrates with another service, such as a tax service, then adding it to the “Integrations” setting tab in its own section is a good choice.
Finally, if your plugin has settings that don’t fit well in an existing section or within Integrations, then adding a new tab for this plugin’s settings is the right call.
Adding Settings to an Existing Tab and Section
Adding your settings will require you to (1) create your array of new settings, then (2) add them into the right section / group of settings. The great part about using WooCommerce settings is that you don’t have to worry about saving, validating, or sanitizing your settings, as WooCommerce will handle all of that for you when you add them into an existing settings area.
There are two ways to do add our settings: merge settings to an existing group, or create a new section / group.
Merge Settings into an existing group
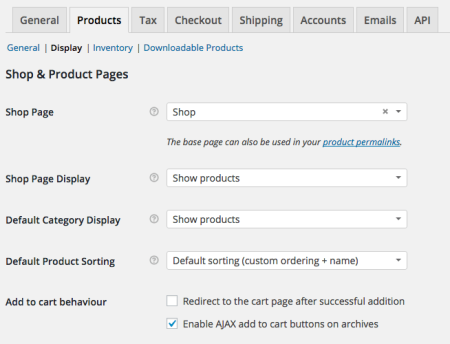
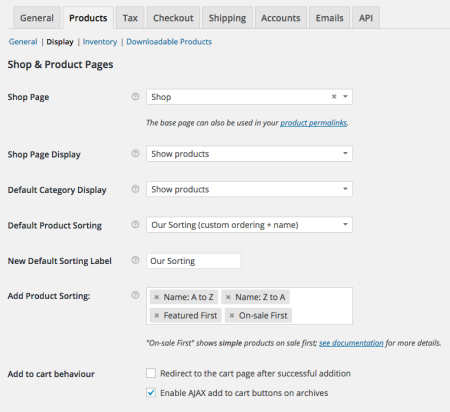
You’ll commonly add your setting(s) to a group of WooCommerce settings. We’re going to use our free Extra Product Sorting Options plugin in this example, as it adds settings right in after the WooCommerce sorting options setting.
The basic idea is to have 3 arrays: the original settings, your new settings, and an “updated” settings array that you’ll build and return to WooCommerce.
- Create a blank updated settings array. We’ll use this to add the existing settings into, then merge our new settings in.
-
Create your new settings array, which can include 1 or more settings arrays. If you’re not sure which field types are available, look at what WooCommerce itself uses.
-
Now we’ll loop through the existing settings. For each setting, push it into the new settings array.
function add_my_settings( $settings ) {

    $updated_settings = array();
    $new_settings = array(
          // this is where you create your settings
    );

    // loop through settings to add them to the update ones and insert the new ones
    foreach ( $settings as $setting ) {
        // merge the existing settings into our new array
        $updated_settings[] = $setting;

        // determine which setting you want to add yours after
        if ( isset( $setting['id'] ) && 'add_after_this_setting_id' === $setting['id'] ) {
            $updated_settings = array_merge( $updated_settings, $new_settings );
        }
    }

    return $updated_settings;
}
add_filter( 'woocommerce_some_settings_im_adding_stuff_to', 'add_my_settings' );
If you want something more than a form sample, check out the code to add settings from Extra Product Sorting Options.
Add a Settings Group
You can do the same thing, but add a “heading” for your settings group, by adding a settings section. This will require you to (1) add your settings after another section (not within a section like we just did), and (2) wrap your settings with the section beginning / end. It will look like this:
array(
    'title'     => __( 'My Settings Section', 'my-textdomain' ),
    'type'      => 'title',
    'id'        => 'my_settings_section',
),

// your actual settings fields just like above

array(
    'type'  => 'sectionend',
    'id'    => 'my_settings_section',
),
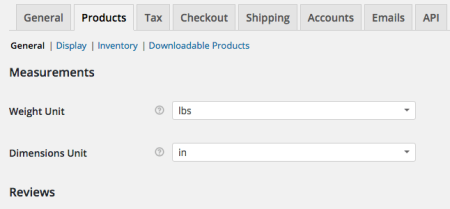
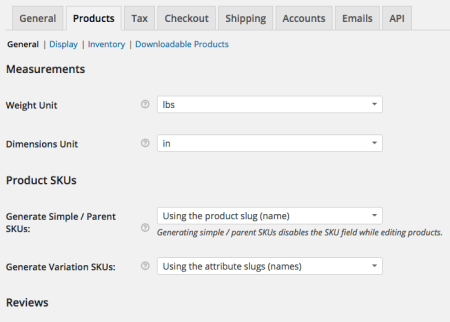
Now instead of adding settings into an existing section, your settings will have their own section / header:
This is work pretty much the same was as the last example in terms of merging settings arrays; however, instead of using a setting ID to add your settings after, make sure that you use a sectionend setting-type’s ID so we’re beginning a new section after the existing one. You could also confirm this when you check for the setting ID to add your settings after — an additional check for 'sectionend' === $setting['type'] won’t hurt.
Want a working sample? The Product SKU Generator adds a settings section, but be aware it looks a bit different because (1) we create the settings in a separate methods (so it’s easy to add defaults), and (2) there’s a WooCommerce compat check since the section we add settings after changed in WooCommerce 2.3.
Adding Settings to an Existing Tab in a New Section
If your settings belong in a WooCommerce tab, but they don’t fit well with an existing section, you can also create your own section. You’ll first filter the settings sections for the tab to add your own, then you’ll filter the settings to show your own if your section is being displayed.
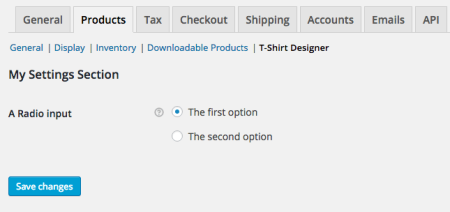
WooCommerce has a very helpful document on adding a new settings section, and here’s a simple for sample for adding a section to the “Products” settings tab.
The form sample adds our new section and setting:
Other Settings Uses
This should cover you to add settings to any existing WooCommerce settings tab or section, or to create your own section.
If your settings don’t fit here, then you can look to use the Integrations tab or add your own settings tab, which we’ll cover in our next tutorials.
