
When our Print Invoices & Packing Lists rewrite was released, we talked about how customizing templates was modified. The goal of these changes was to make it far easier to modify templates in an upgrade-safe way so that they didn’t have to be overridden for changes to take effect.
To that end, a more modular template approach was taken, along with the addition of ample WordPress hooks to allow changes changes as needed. (Our developer documentation has a reference list of several helpful hooks.)
Today we’ll take a look at a few examples of modifying Print Invoices & Packing Lists templates, which can let you modify all documents, or target certain documents for changes (like invoices).
Example 1: Add a Thumbnail Column
Adding columns to documents will require two steps: add a header for the column, and add the cell with the data that should be present for each row in the items table. There are two filters in place to help us with this so that we can modify the default order items table.

Step 1: First we’ll need to add the header for our thumbnail column. The wc_pip_document_table_headers filter gives us a way to modify existing headers, remove them, or add new ones.
As this filter is used by every document type (invoices, packing lists, and pick lists), we can change the way every document looks pretty quickly. Let’s add in our new header before the rest of the columns (I’m going to choose to leave the name blank, but you could name this something like “Thumbnail” instead).
/**
 * Filter the document table headers to add a product thumbnail header
 *
 * @param array $table_headers Table column headers
 * @return array The updated table column headers
 */
function sv_wc_pip_document_table_headers_product_thumbnail( $table_headers ) {

    $thumbnail_header = array( 'product_thumbnail' => '' );

    // add product thumbnail column as the first column
    return array_merge( $thumbnail_header, $table_headers );
}
add_filter( 'wc_pip_document_table_headers', 'sv_wc_pip_document_table_headers_product_thumbnail' );
This gives us our thumbnail column first, then it adds the rest of the existing headers after our new column.
If we wanted to scope this to a particular document type, we could do so easily. This filter does contain additional params, one of which is the document type:
apply_filters( 'wc_pip_document_table_headers', $table_headers, $order_id, $document_type );
So for example, you could scope your code to invoices specifically if desired by adding a check first:
if ( 'invoice' !== $document_type ) {
    return;
}
Step 2: Now that the header has been added, we’ll want to be sure this cell in our table is filled with the thumbnail image for each row. Note the ID you gave the header in the previous step; we’ll use it to fill the cell data here with the wc_pip_document_table_row_cells filter.
/**
 * Filter the document table row cells to add product thumbnail column data
 *
 * @param string $table_row_cells The table row cells.
 * @param string $type WC_PIP_Document type
 * @param string $item_id Item id
 * @param array $item Item data
 * @param \WC_Product $product Product object
 * @return array The filtered table row cells.
 */
function sv_wc_pip_document_table_row_cells_product_thumbnail( $table_row_cells, $document_type, $item_id, $item, $product ) {

    // get the product's or variation's thumbnail; you may want to set the size depending on the default shop_thumbnail size
    $thumbnail_content = array( 'product_thumbnail' => $product->get_image( array( 75, 75 ) ) );

    // add product thumbnail column as the first column
    return array_merge( $thumbnail_content, $table_row_cells );
}
add_filter( 'wc_pip_document_table_row_cells', 'sv_wc_pip_document_table_row_cells_product_thumbnail', 10, 5 );
We could scope this code to a document type as well just as the above example does, but in our case, we’ll add the thumbnail to all documents, so it’s not needed. This will give us a new column with the product image at the beginning of our order items table:
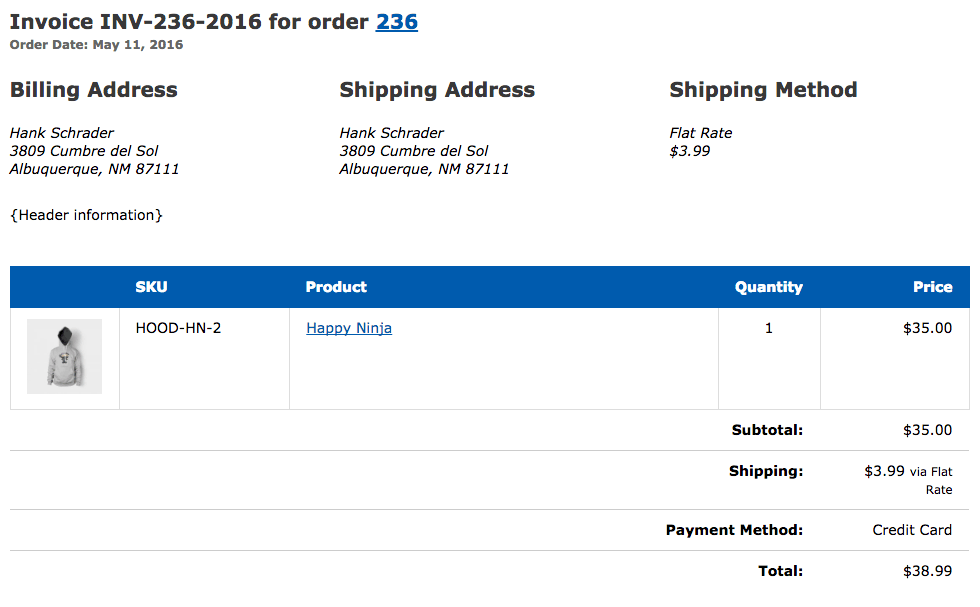
You can see the full snippet, with more detail such as modifying the image styles with CSS, in our snippets repository.
Example 2: Remove Columns Based on Document Type
Removing columns will be the reverse process of adding them; we’ll need to modify headers, as well as the cells, in the table.
Step 1: Remove the column headers
In this case, we’ll be scoping our changes to a particular document type. Let’s remove the sku column from invoices, while removing the weight column from packing lists and pick lists.
We’ll use the same filters as before, but this time, we’ll unset the headers and cells we don’t want. First, let’s check our document type, and if the header we want to remove is present, unset it.
/**
 * Filter the document table headers and row cells to remove column headers
 *
 * @param array $table_headers Table column headers
 * @param int $order_id WC_Order id
 * @param string $document_type WC_PIP_Document type
 * @return array The updated table column headers
 */
function sv_wc_pip_document_table_headers_remove_columns( $table_headers, $order_id, $type ) {

    // remove SKU columns on invoices
    if ( 'invoice' === $type && isset( $table_headers['sku'] ) ) {
        unset( $table_headers['sku'] );
    }

    // remove weight column from packing and pick lists
    elseif ( ( 'packing-list' === $type || 'pick-list' === $type ) && isset( $table_headers['weight'] ) ) {
        unset( $table_headers['weight'] );
    }

    return $table_headers;
}
add_filter( 'wc_pip_document_table_headers', 'sv_wc_pip_document_table_headers_remove_columns', 10, 3 );
Now we’ll need to remove our table cells as well using a similar process. We’ll check the document type and if our cells exist again.
/**
 * Filter the document table row cells to remove column data
 *
 * @param string $table_row_cells The table row cells.
 * @param string $type WC_PIP_Document type
 * @param string $item_id Item id
 * @param array $item Item data
 * @param \WC_Product $product Product object
 * @param \WC_Order $order Order object
 * @return array The filtered table row cells.
 */
function sv_wc_pip_document_table_row_cells_remove_columns( $table_row_cells, $type, $item_id, $item, $product, $order ) {

    // remove SKU columns on invoices
    if ( 'invoice' === $type && isset( $table_row_cells['sku'] ) ) {
        unset( $table_row_cells['sku'] );
    }

    // remove weight column from packing and pick lists
    elseif ( ( 'packing-list' === $type || 'pick-list' === $type ) && isset( $table_row_cells['weight'] ) ) {
        unset( $table_row_cells['weight'] );
    }

    return $table_row_cells;
}
add_filter( 'wc_pip_document_table_row_cells', 'sv_wc_pip_document_table_row_cells_remove_columns', 10, 6 );
Now our invoices will remove the SKU column completely.
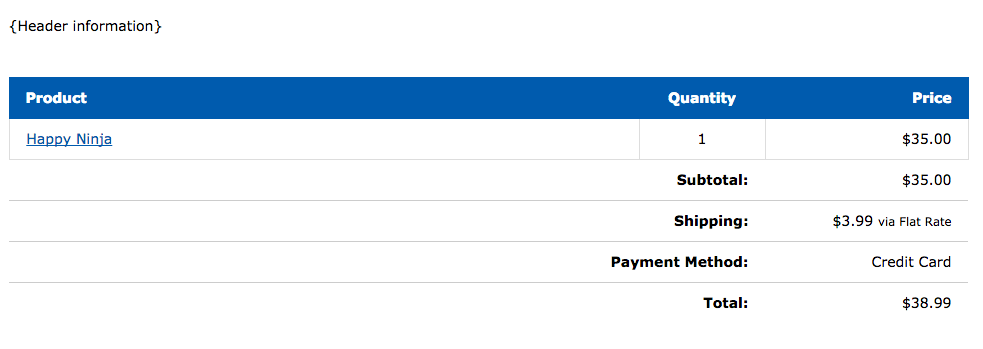
Invoice column removed
However, I’ll put one final level of polish on the packing lists before wrapping up. Packing list documents will have weight in the columns, but they’ll also show a “total weight” for the order below the table.
We’ll want to remove this total as well since the weight column is gone, so I can filter the table footer to do so.
/**
 * Filter the footer rows to remove data for packing lists
 *
 * @param array $rows footer rows and cells
 * @param string $document_type the type of document being generated
 * @return array - the updated footer rows and cells
 */
function sv_wc_pip_document_table_footer_modification( $rows, $document_type ) {

    if ( 'packing-list' !== $document_type ) {
        return $rows;
    }

    if ( isset( $rows['totals']['total-weight'] ) ) {
        unset( $rows['totals']['total-weight'] );
    }

    return $rows;
}
add_filter( 'wc_pip_document_table_footer', 'sv_wc_pip_document_table_footer_modification', 10, 2 );
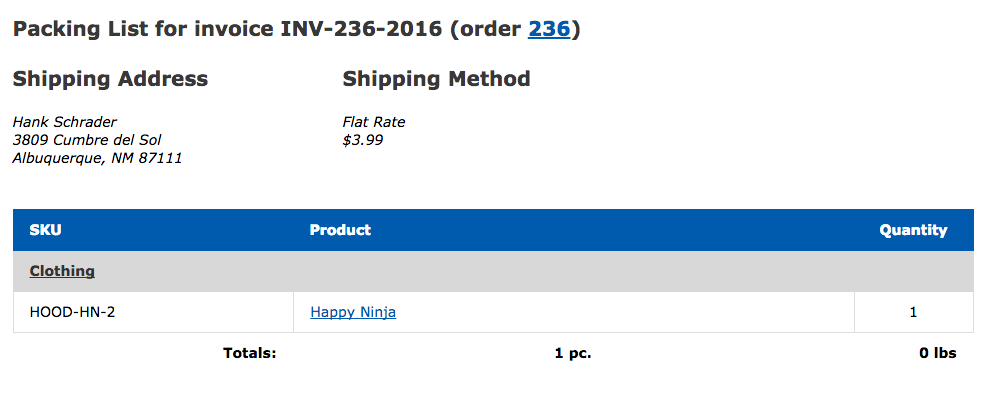
Now weights are completely removed from packing lists and pick lists.
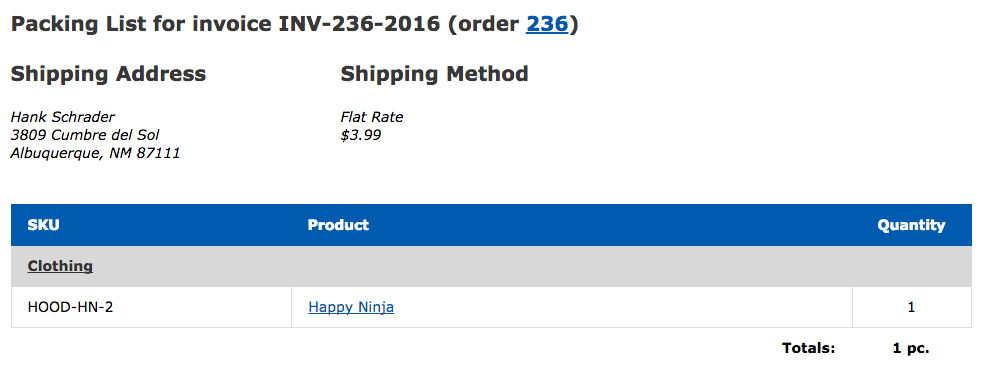
Packing List column removed
You can view the full code for this example in our snippets repo as well.
Summary
Print Invoices & Packing Lists has several hooks available throughout the plugin, but especially has lots of them in template files.
While you can still make changes by overriding templates, this gives you a more upgrade-safe way to make modifications to your documents, as templates can be updated in the future, but these hooks will remain backwards-compatible so that your modifications are not lost.
Need some help taking this code further? We recommend Codeable for small custom projects.
[…] can customize the WooCommerce Print Invoices & Packing Lists plugin documents with this tutorial on working with templates from […]
Hi. I’ve added the code for your GitHub but am trying to only show thumbnails on the Invoice and not the packing or picking slip. I tried adding the check you have above but o matter what I try I get an error. Where do I add the check the thumbnail column only shows on the Invoice?
Hi Dain, this check needs to be the first thing in the function, but as these are filters, you need to ensure you return the variable that was passed in: https://gist.github.com/bekarice/f6c5da70d781aa46087fe931e748a1be
Ah I see! Thank you it’s working perfectly now.
Hi! I’ve added the Github code that was linked, but I always get this error:
Fatal error: Uncaught Error: Call to a member function get_image() on boolean… etc.
WP: 4.8
WC: 3.1.0
PIP: 3.3.2
Nevermind… It was something in the browser cache, it works good!
Hello. Those are awesome modifications that I just needed – thank you for creating those.
I’ve got a question though. I am using chained products, and because of that I often have multiple same products added. It ends up like that in picking/packing lists: https://imgur.com/a/IuY1o
Do you know of any way to merge/stack those, or could you point me in some direction?
Thanks!
Hello! Great plugin 🙂
Was wondering how to add price to the packing slip – is this through functions.php?
Joseph